So, you know how you can live with something for weeks, months, sometimes even years without it really bothering you? And then one day, it’s like something in your head snaps and you absolutely can’t live with it a second longer? This happened to me last week when I walked into the vestry and realised it was a complete mess and had a good old throwing out session. It happened to me again on Saturday while I was cleaning my teeth and bemoaning the state of the sealant around my sink in my head. Suddenly I had enough and fetched a knife from the kitchen and ripped all the old, slightly mouldy (no matter what I do) sealant from around the sink, then, flushed with success ripped it out from around the bath as well.
Course, this meant a trip to B&Q to purchase sealant, a sealant gun and, since I was doing bathroom DIY I thought i’d really go for it and also bought new tile paint, caulk to fill the half inch gap between the bath and the tiles, grout whitener, sand paper, white spirit, and a glue gun (which I didn’t need for the bathroom, but just really wanted).
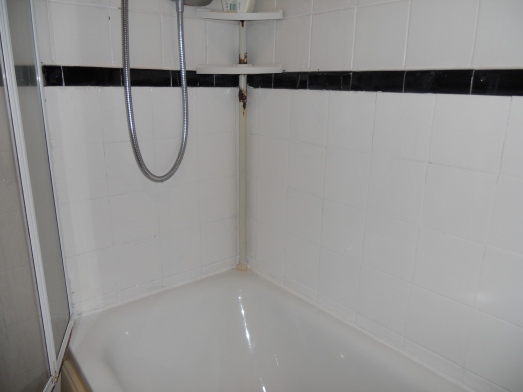
The shower / bath started off looking like this:
See where all the paint is coming off? Well those tiles were painted when I moved in, and were already starting to flake. Having repainted them with proper (and by this I mean expensive) tile paint, I have come to the conclusion that the reason the paint flaked off is because the original paint was ordinary emulsion / masonry paint. There is no way that was tile paint it is nothing like what I used on Sunday. You can’t see it in this picture because it had already been ripped out in my fit of sealant ripping that started this all off, but the sealant around the bath / tiles was really mouldy in that ingrained can’t-scrub-off-no-matter-how-hard-you-try kind of way. In this photo I have added the caulk to the gaping hole between the tiles and the bath and am sanding ready for painting.
After paining it looked like this:
Already so, so much better. I was amazed by what a transformation just painting the tiles gave. They only had one coat, so I will probably go back and do another coat on the weekend, to give a really good finish. Sadly, I can do very little about the rusty pole holding my shower gel etc (except buy a new pole). I broke the shower rail that holds the shower head up the other day so when our church handy man is around next i’m going to get him to put up the new one I bought on Saturday, and once that is up I might invest in one of those shelf things that hooks over the shower rail. Till then, the rusty corner unit will have to suffice (though I expect it is not long for this world). The grouting still looks mucky in this picture – I scrub it with an old tooth brush and some bleach but it always still looks dirty, so I got one of those pens you can go over the grouting with, and now it looks like this:
So that is a huge improvement! I love before and after photos, I just wish I’d thought to do one before I ripped the original sealant out!
Whenever I go in the bathroom I keep looking at the bath / shower and feeling incredibly pleased with myself – it’s lovely to have something done and sorted out that has been an issue for ages. In this picture you can see the re-applied sealant. I’m not sure that I am brilliant at sealant – it’s never going to win any beauty awards, but it is sealed and water tightand that is the aim of the job!
I’ve also been doing some sewing and mending, so i’ll write all about that in my next post.


